Getting a tattoo is an exhilarating experience, but let’s face it—the thought of that buzzing needle can make even the bravest among us wince. For those who prefer to keep pain at bay, tattoo numbing creams have become a popular solution. However, using them effectively requires more than just slapping some cream on your skin. Here’s a detailed, step-by-step guide to applying tattoo numbing cream for a pain-free tattooing experience.
Understanding Tattoo Numbing Cream: What It Does and How It Works
Tattoo numbing creams are topical anesthetics designed to reduce the pain associated with tattooing. They work by dulling the nerve endings in the area where they’re applied.
- Active Ingredients: Most creams include lidocaine, benzocaine, or prilocaine—agents that block nerve signals temporarily.
- Duration: The effects typically last for 1-3 hours, depending on the formula and application method.
- Limitations: While numbing cream can reduce pain, it won’t eliminate all sensation. Expect mild pressure or vibration during the tattoo process.
Is Numbing Cream Right for You?
Before diving into the application process, it’s essential to know whether numbing cream is a good fit for your tattoo session:
- Best for: Large or intricate designs, sensitive areas (like ribs or inner arms), or clients with a low pain tolerance.
- Not ideal for: Quick or small tattoos, as the application process might take longer than the tattoo itself.
Always consult your tattoo artist before using numbing cream. Some artists prefer working on untreated skin for better ink absorption and precision.
Preparing for Application: What You’ll Need
To get started, gather the following:
- A high-quality tattoo numbing cream.
- Plastic wrap (cling film works perfectly).
- Mild soap or antibacterial cleanser.
- Disposable gloves.
- A damp, clean cloth or paper towel.
Step-by-Step Guide to Applying Tattoo Numbing Cream
Follow these steps to ensure your skin is prepped and numbed effectively:
Step 1: Cleanse the Skin
Start with clean skin to remove any dirt, oils, or bacteria. Use mild soap or an antibacterial cleanser, and rinse thoroughly. Pat the area dry with a clean towel.
Why it’s important: A clean surface ensures the cream can penetrate the skin properly and reduces the risk of infection.
Step 2: Exfoliate Lightly
For maximum absorption, gently exfoliate the tattoo area with a soft scrub or washcloth. This removes dead skin cells and enhances the cream’s effectiveness.
Pro Tip: Avoid harsh scrubbing, which could irritate the skin.
Step 3: Apply a Generous Layer of Numbing Cream
Using disposable gloves, apply a thick, even layer of numbing cream over the area to be tattooed. The layer should be about 2-3 millimeters thick.
Key Tip: Don’t rub the cream into the skin; you want it to sit on the surface to soak in gradually.
Step 4: Cover with Plastic Wrap
Wrap the treated area tightly with plastic wrap. This traps heat, activating the cream and enhancing its absorption into the skin.
- Leave the wrap on for 30-45 minutes or as instructed on the cream’s packaging.
- Check periodically to ensure the cream stays in place and the skin feels numb.
Important: The longer the wrap stays on (within the recommended timeframe), the more effective the numbing effect will be.
Step 5: Remove the Wrap and Wipe Off Excess Cream
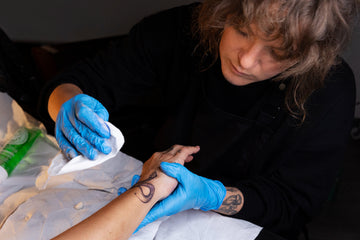
After the recommended time has passed, remove the plastic wrap and gently wipe off any remaining cream with a damp cloth. Your skin should feel slightly numb to the touch.
Final Prep: Let your tattoo artist know you’ve applied numbing cream. They may clean the area again before starting.
Dos and Don’ts for Using Numbing Cream
-
Do:
- Perform a patch test 24 hours beforehand to check for allergic reactions.
- Follow the instructions on the product label meticulously.
- Use gloves to avoid numbing unintended areas.
-
Don’t:
- Overapply the cream; excess amounts won’t increase effectiveness and might cause skin irritation.
- Skip consulting your tattoo artist, as some may not prefer working with numbed skin.
- Use numbing cream on broken or irritated skin.
What to Expect During the Tattoo Process
Once the numbing cream is wiped off, its effects should last for several hours. You might feel some mild sensations, but the pain should be significantly reduced. Keep in mind:
- Some areas may lose numbness faster due to body heat or movement.
- Your artist may pause for breaks, which could shorten the duration of the cream’s effect.
Aftercare Tips for Numbed Tattoos
Once your tattoo session is complete, it’s crucial to care for your new ink properly to ensure optimal healing and vibrant results:
- Keep the area clean and moisturized.
- Avoid direct sunlight and submerging the tattoo in water for at least two weeks.
- Follow your artist’s specific aftercare recommendations.
Common Myths About Tattoo Numbing Cream
-
Myth: Numbing cream ruins tattoos.
Truth: When used correctly, numbing cream doesn’t interfere with ink application. Issues arise only with improper application or overuse. -
Myth: It’s only for people with low pain tolerance.
Truth: Everyone has different pain thresholds. Numbing cream is a practical choice for long sessions or sensitive areas. -
Myth: All numbing creams are the same.
Truth: Quality varies significantly. Invest in a reputable brand for safe, effective results.
Tattoo numbing cream can be a game-changer, especially for those hesitant about the pain involved in tattooing. By following the steps outlined above, you can ensure a smooth, comfortable tattoo session without compromising the quality of your ink. Remember, preparation is everything—choose a good cream, apply it correctly, and communicate with your tattoo artist for the best results.


